Sometimes, the Temple wallet stops properly working because it uses a connection point to the blockchain, the Tezos Node, that is down. In this case, it's better to switch this Node to other. You can do it manually by following this instruction.
The first option is to choose a node from the predefined list:
The second option. Add a RPC manually:
1. Click the "Robot" icon and choose the "Settings" option
2. Select Networks:
3. Add your new network:
[1] write any name for the network
[2] Add RPC base URL (see bellow the list of the most popular Public Nodes RPC base URL). By default the Temple wallet uses:
https://mainnet-node.madfish.solutions
[4] Click the button "Add network".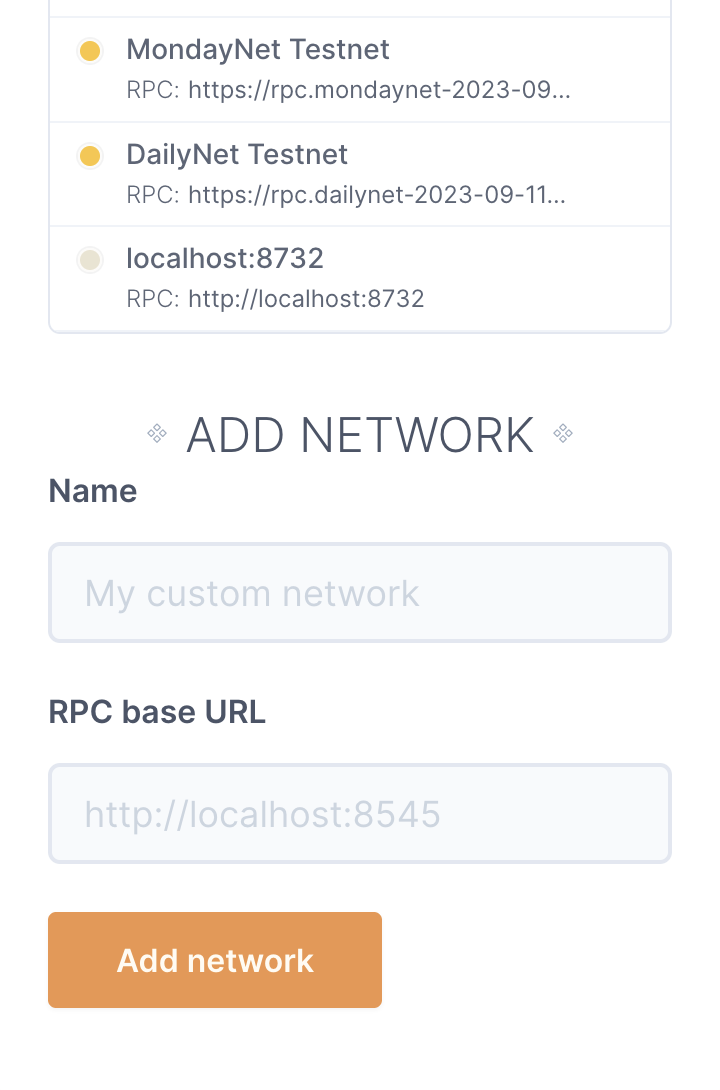
In the field RPC base URL you may add on of the following public nodes:
https://mainnet.smartpy.io
- Nodes operated by Blockscale on behalf of the Tezos Foundation:
https://rpc.tzbeta.net/
- ECAD Labs nodes:
https://api.tez.ie/rpc/mainnet
- Teznode from LetzBake!:
https://teznode.letzbake.com
5. That's all from now you have an alternative access point to the blockchain via the Temple wallet. Just click the Network dropdown and switch to the new Network.
If you encountered any problems, please feel free to ask your questions in our telegram or discord communities.